I love custom furniture! My Insta saves are full of custom upholstery and furniture design. One of my many, many dreams is a furniture line. One day…
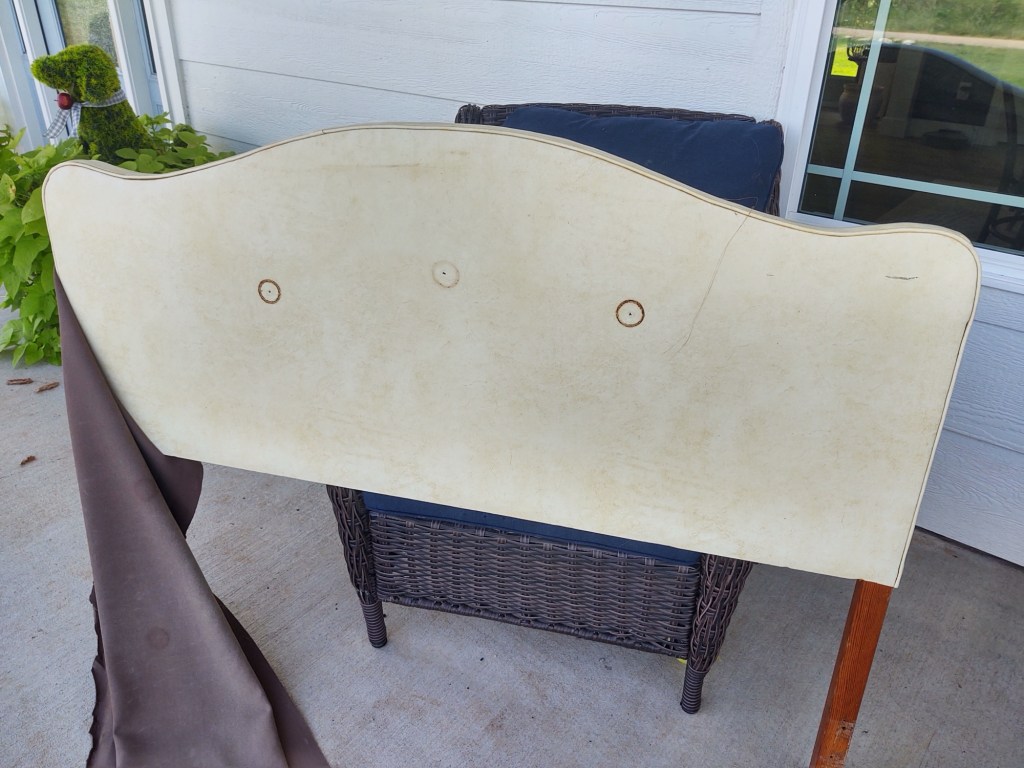
I started my upholstery journey a few years ago with a headboard found on Facebook Marketplace. I needed a full-sized headboard for our guest room and love a unique shape. This one was perfect! Well, besides the dingey white leather…. And what are those circles??
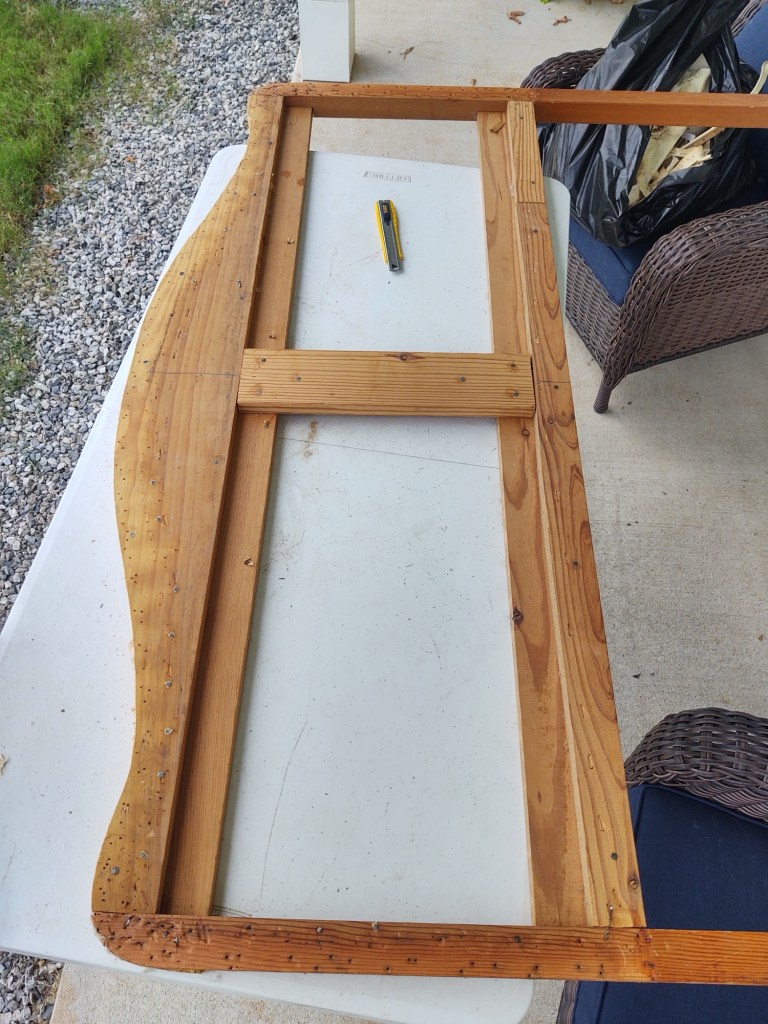
I got it home and started to remove the old leather covering. A million and a half staples and nails later, I got down to the bones. I had watched a few videos on YouTube that said to take note of the construction in order to replicate it. If it ain’t broke…. You know.
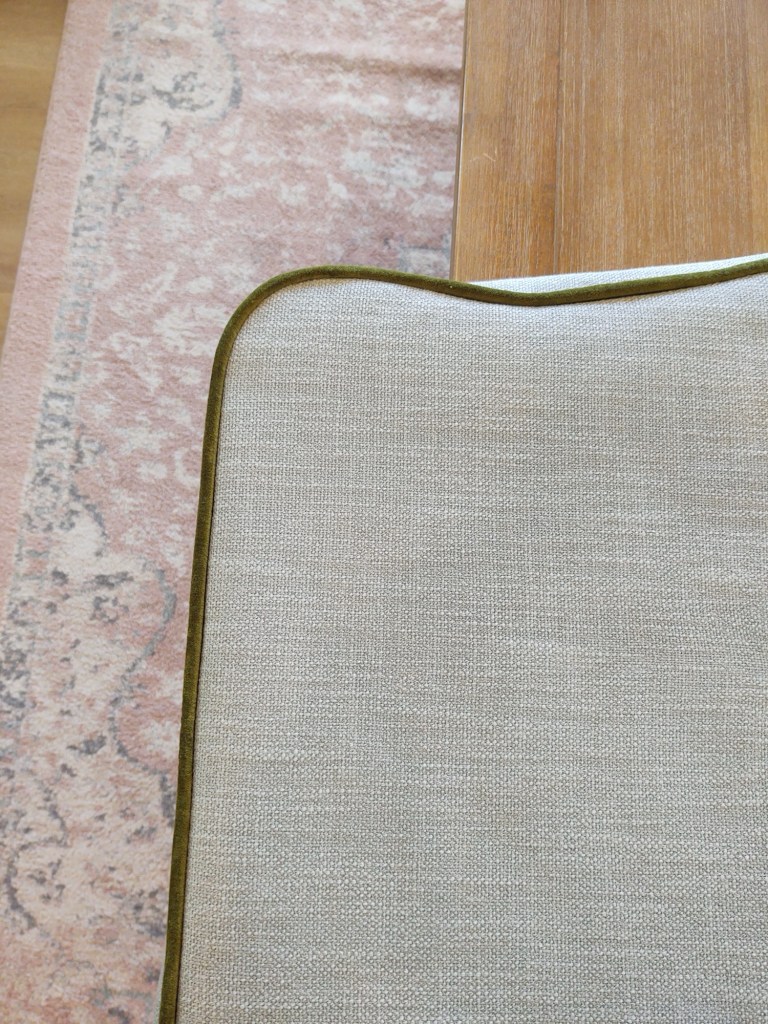
To Hobby Lobby I went! I wanted an aqua velvet, but came home with a sort of tweed fabric, with green piping for the seams. I had zero idea how I would attach it outside of my staple gun, I just knew a needle and thread was not on the agenda.

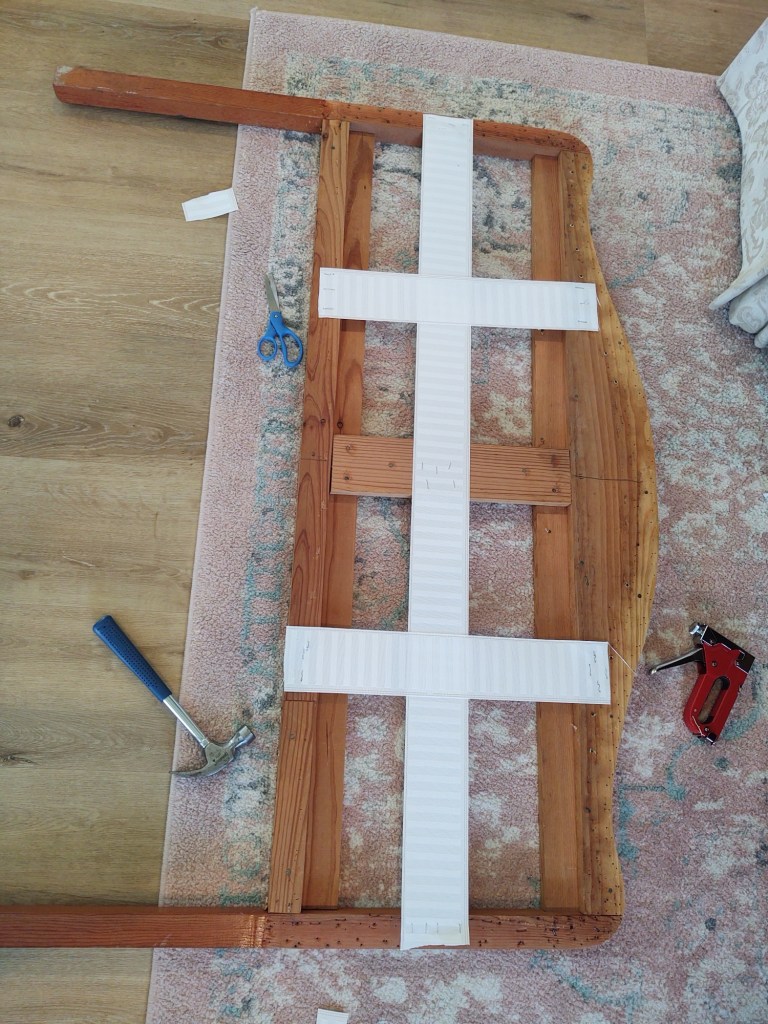
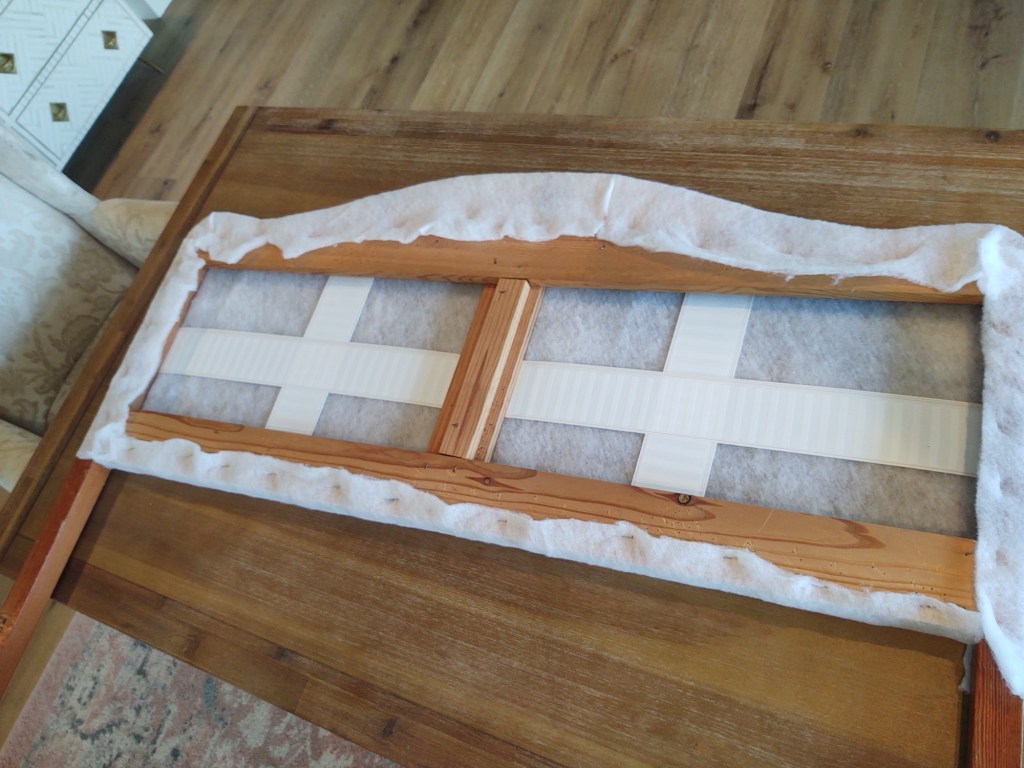
After adding new webbing for support, I covered it with batting.

Then, started stapling the fabric to the frame. Pretty straightforward. But be sure to check periodically for wrinkling, and go side to side to keep tension. Don’t start at one side and go around.

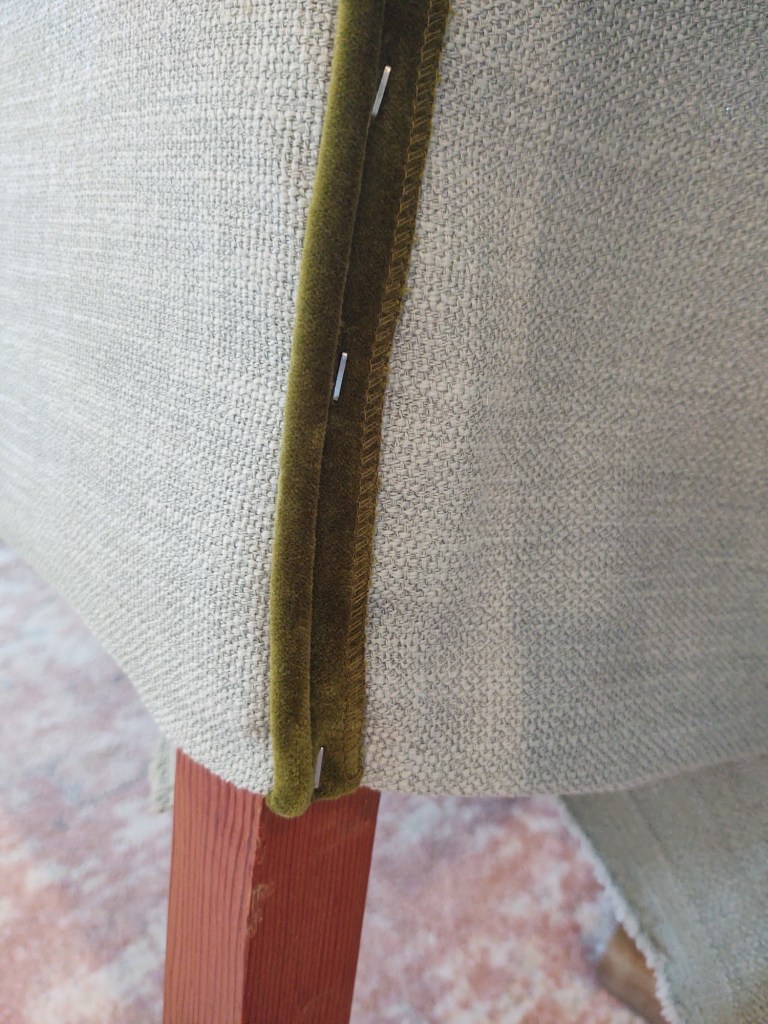
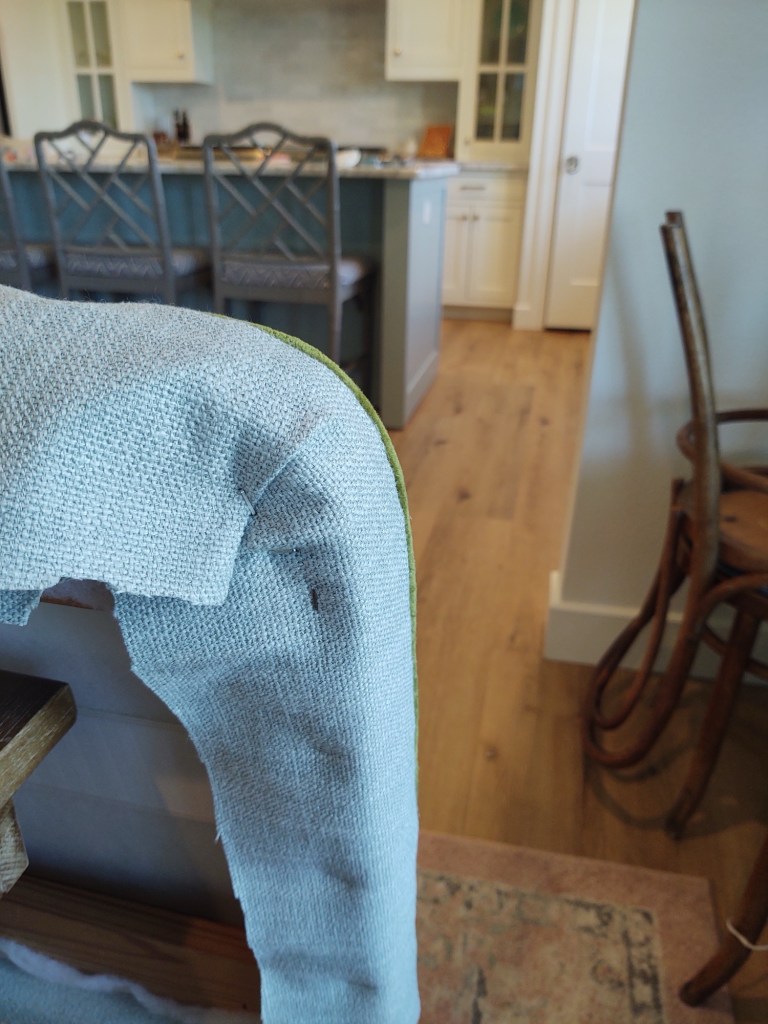
Now, it was time for the piping. I stapled it right at the edge of the frame, where it was visible from the front.
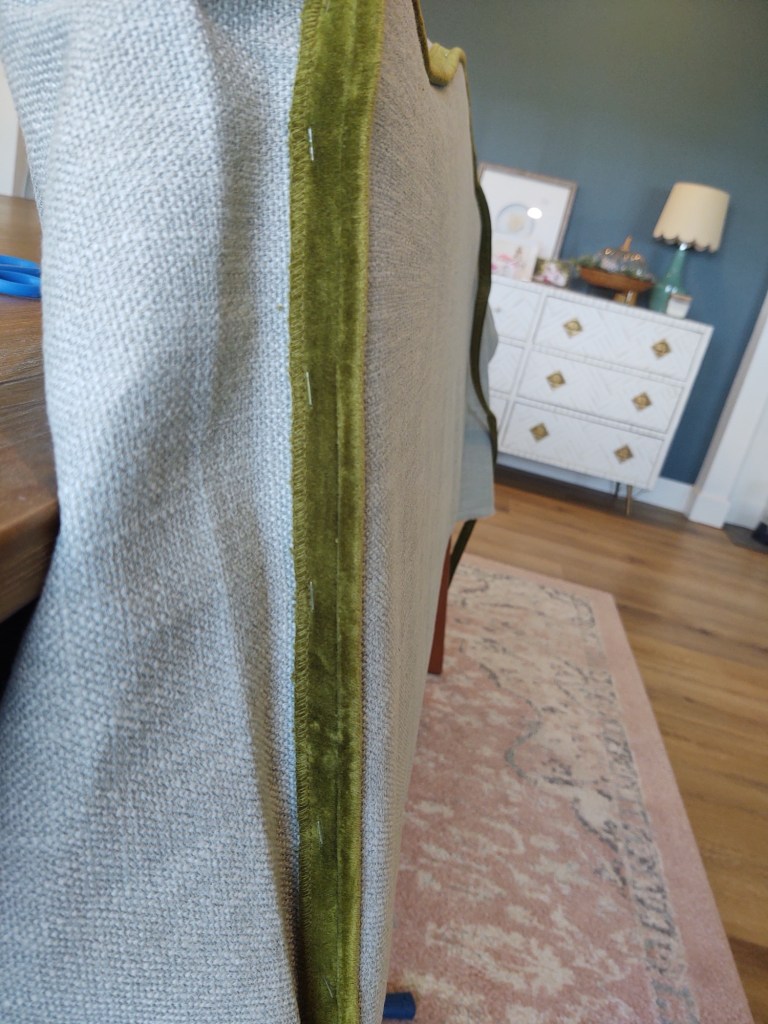

Once that was finished, I needed to figure out how to cover the staples with the rest of the fabric. Now, I would do this a completely different way. But this was so easy, a trained monkey with a hot glue gone can do it. So that’s what I did!
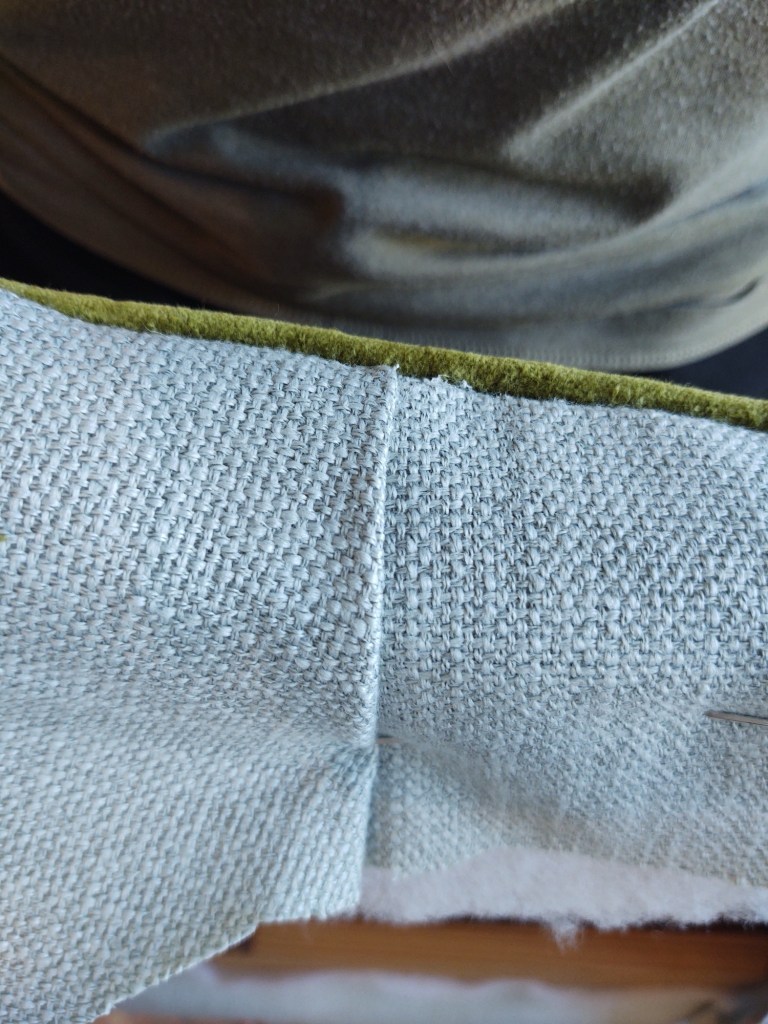
I brought a cut and folded strip of fabric up to meet the piping and hot glued it down. Pro tip: use a scrap to protect the piping and front fabric from getting glue on them.


At some point, the fabric ran out due to the curved edges. I just started with another piece, folded an edge over the raw edge of the other side, and kept going.
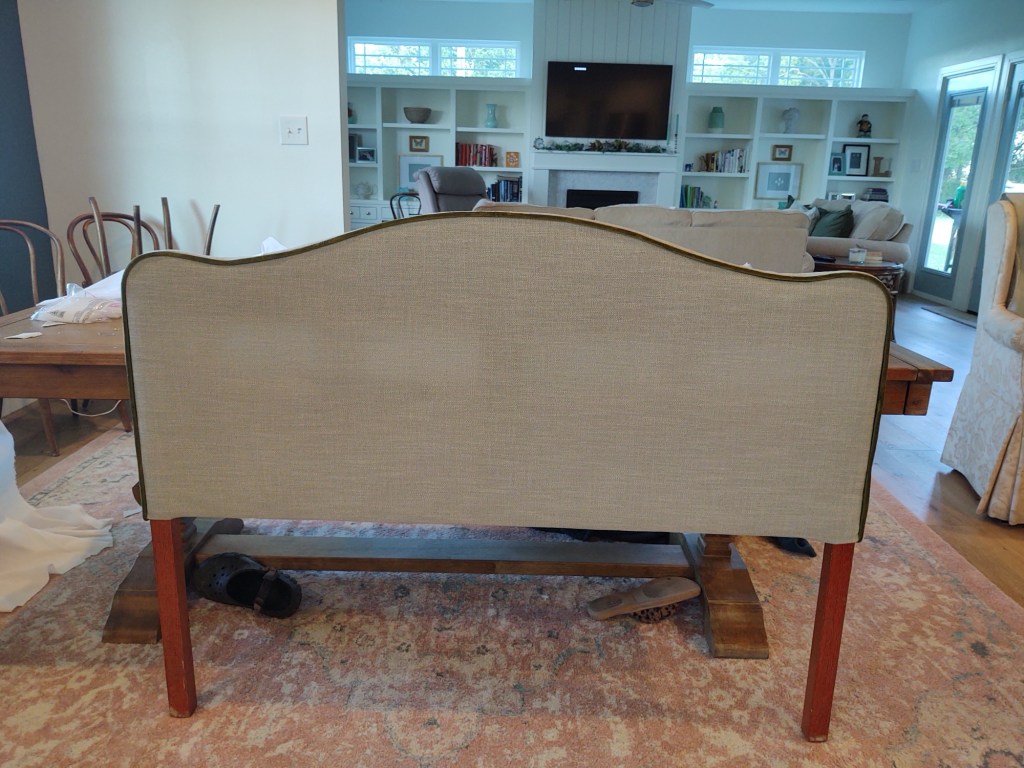
Once you’ve got it glued down and dried, staple the rest of the fabric around! You can add a backing fabric or use the same fabric as the front to cover the back.
Y’all, it actually worked. I’ve had this in my guest room for four years and she still looks good!
Don’t let the fear of sewing get in the way of making something unique and beautiful for your home! Have you done any fun, no-sew upholstery projects around your home? I’d love to hear about it!
xo, Amanda
Discover more from The House on Ladd
Subscribe to get the latest posts sent to your email.
