Dining Room Makeover: Soft Furnishings

Finally! The wait for fabric and drapes is over.

First up, the drapes! I bought them from Neutral, an online shop that makes custom sized curtains. I was searching all over for affordable (but not cheap or requiring hemming), aqua-ish, silk drapes. Preferably pinch pleated and 50ish inches wide.

I found the perfect hue in the Rina Premium Silk Drapes in Cyan. I was torn between Cyan and Light Blue, so I ordered samples of both. What arrived was two sample books: one of all the Rina Silk options and one of all their lining options. That made the decisions so much easier! Thanks, Neutral! (Not sponsored, a girl can dream.)

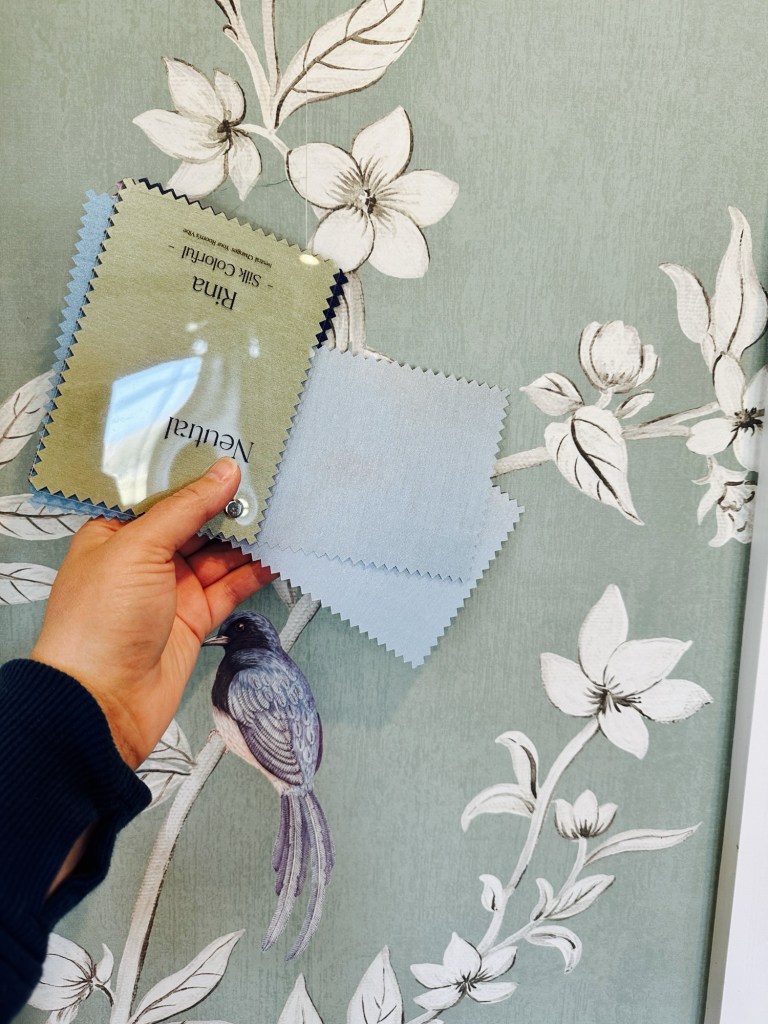
I ordered them on 10/14 and they arrived 10/24. I was concerned due to recent customs issues, but they had no issue making the leap from China to me. They even came with adjustable hangers to hang them on the curtain rings.

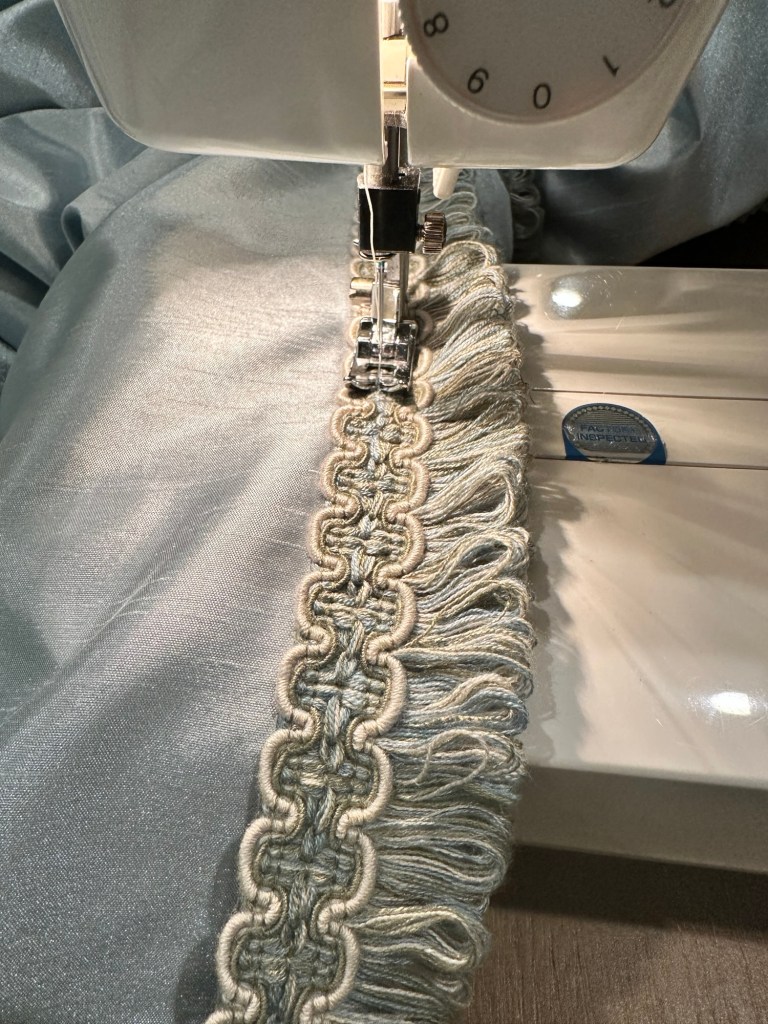
Of course, I had to dress them up with this trim from Etsy. Even Austin agrees that the trim was a necessary addition to tie everything together. I sewed them on with just a straight stitch. So far, so good! Then I left them to train after steaming out the creases.

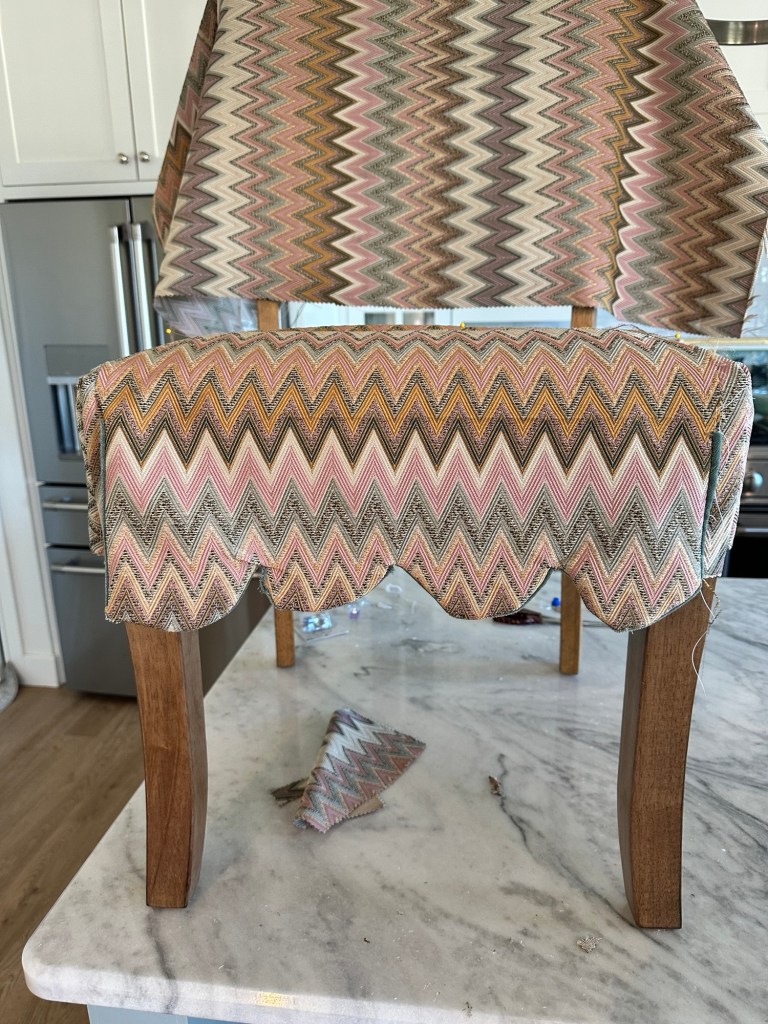
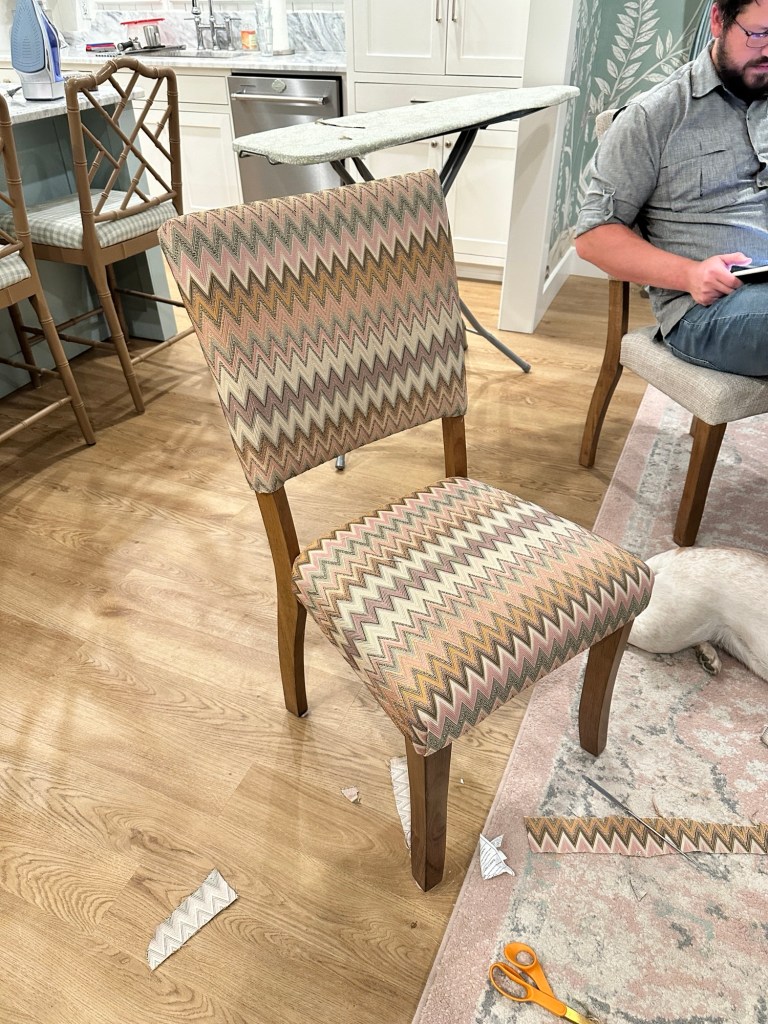
Next up, I ended up ordering the chevron fabric after all, much to Austin’s chagrin… he’s coming around, I promise :).

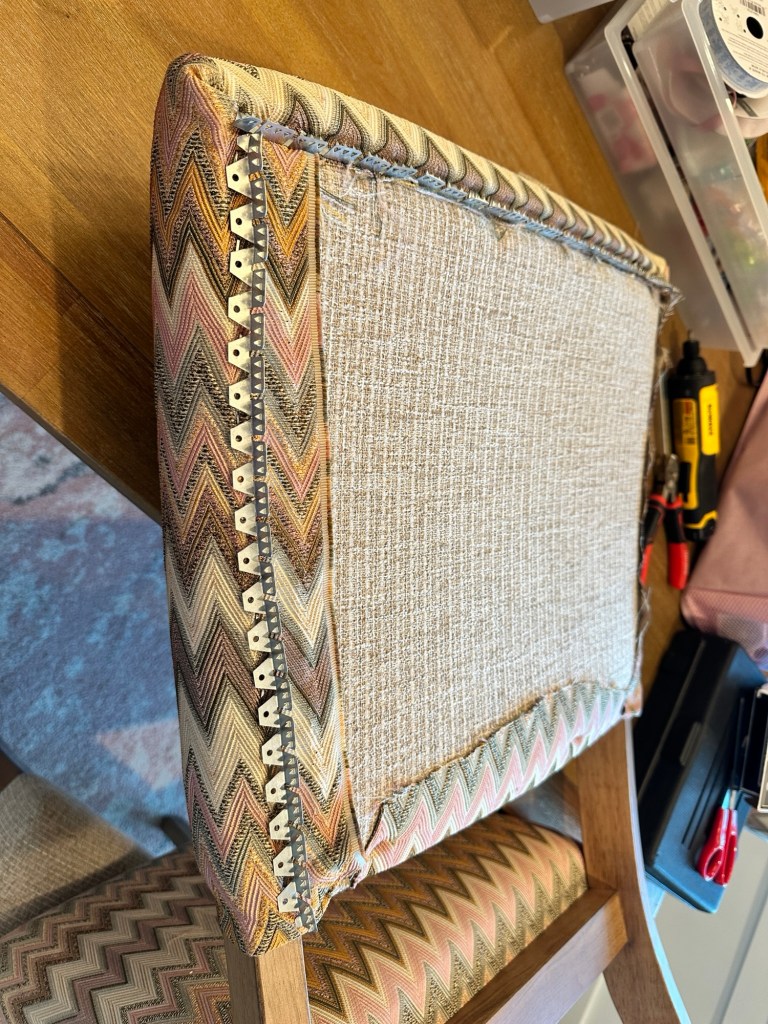
My original plan was slipcovers, but after several attempts and making 10 yards of piping, I gave up and grabbed my staple gun. All was well until I got to the back and had to reckon with my decisions. Thankfully, I was going to reupholster a different set of chairs once upon a time, and had bought this metal tack strip that saved the day. Thanks, past self. I love when that happens.

I attempted scallops. Did not go well.
Made an absolute ton of piping. Did not use.

When Austin got home, we worked on the back, and wouldn’t you believe that it actually worked?! I wish I could say I was less surprised but wow, could it all really be so easy? Ask me again in a year for how they’ve held up.

Whew, y’all. I can see the finish line. It’s still past five chairs, but it’s there. With three week until Thanksgiving. Tender mercies.

I’ll keep you posted!

xo, Amanda

Dining Room Makeover: Wallpaper is complete!

It’s been a busy few weeks, and I am thrilled to show you the progress!

So, we left off at putting up the trim. I then spent every day off priming, caulking and painting. I was dragging my feet and making excuses for a few days before attempting the wallpaper. After getting a $2,500 quote to hang the paper, I realized I am definitely cheap enough to try to hang it myself, and since the paper is affordable (unlike our Farrow & Ball paper in the primary bath), I figured the risk was worth it.

After watching a lot of videos on YouTube (shout out to Spencer Colgan Wallpaper & Painting, I would be lost without his instruction!), I finally worked up the courage. Per his infinite wisdom, I decided the best place to start was over the kitchen side opening. I went a little cheap with the paper, estimating that since they are 10′ panels, and my ceilings are only 9′, I could use the excess to cover the stretches of the cased openings, saving having to buy enough rolls to cover them. It worked like a charm!

First panel, I thought, “um, is it really this easy??” And then panel two…. I had to do my first match while simultaneously doing my first corner…. Tears were shed. Lots of them. And when Austin didn’t answer his phone, I sucked it up and found a roll of painter’s tape for an extra set of hands. I made changes for the next corner, for sure.

Pro Tip: I found it easier to do a corner if you only paste one part of the wall at a time. So, most of the time I pasted matching wall, then cut the paper, then pasted the adjoining wall. The third corner I chose to do backward, since it was such a small space and the panel needed to be level with no reference point.

Which brings me to my next Pro Tip: get a laser level!! It was the real MVP of this project. Since there were three areas where the pattern would have to line up without a reference point (i.e., on either sides of the window, and the cased openings), the laser level saved the day. It has both vertical and horizontal lines, and the satisfaction of having all the blue birds line up on the horizontal line is a dopamine hit like no other. So. Satisfying.

This project took 14 hours over two days. And while I could point out every area of mistake, I am proud to have completed this by myself! I took the paper to Home Depot to be color matched to fix some spots where I cut the top too short, or made scratches in the paper. Is it visible in the right light? Yes. Is it visible under the lights I’d have on for guests? Not really. I can live with that.

Don’t be afraid to step out of your comfort zone, you can learn anything!

xo, Amanda

Dining Room Makeover Part 3

We’re back from another weekend of working on our dining room. Are we slow? Absolutely. But who cares? We can take as much time as we want, it’s our house! Feel free to take the time it needs when doing the same in your own home. It’s okay to resist the made up, social media inspired timelines for your life.

Anyway, we are so, so happy with how this is turning out. This is how we started: openings with no trim. When our house was being framed, I noticed that there were no visual breaks in the ceiling between the rooms in our wide open first floor. My husband and our contractor quickly framed out some openings before the drywall sub came out.

In order to add the trim and not look silly or have to be cut (since our thermostat is just on the other side of this little wall), we had to build them out.

Then we started on the trim boards! The amount of shims needed to make the top of these openings level was comical…

This part took the longest. But, boy was it worth it when the trim went up. When we tacked up our test pieces they lined up perfectly. Ahhhhhhh!

It took a while and a few trips to Home Depot and the lumber yard where we bought our windows and doors to figure out what trim to use. I didn’t realize our door trim came in a 5 1/4” width, and I am so glad, as it is exactly what should have been there all along.

The most tedious parts of the trim were the top pieces. It took several tries and saw-blade length cuts to get right. One piece was cut just too short. I was prepared to leave it, as it was 10pm by that point. When the question was raised, Austin said, “I’m a perfectionist. Let’s try one more board.” I knew I loved that man! And of course, perfect. Except that we needed another long board to finish and the lumber yard was closed. Still, #worthit.

While this was going on, I kept feeling that the window just didn’t match the new trim. Austin, being the sweetheart that he is, pulled the 1×2” boards off the main trim to see if it would work. And there it is! With the casing trim around the edge, it’s just like it was supposed to be.

While we didn’t get as much finished as I’d hoped, I am so pleased with the results that I don’t even care. Enjoy the process!

xo, Amanda